RSS

Monthly Archives: February 2012

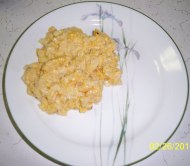
Week 22 – Cheesy Potatoes

Chef Jonathan: This is one of my all-time favourite potato recipes, and I’m so glad that we got to make it this week! It’s very easy to follow, and it tastes amazing. I added more cheese than necessary, of course, and it turned out really well. The only thing I would change for next time, is increasing the temperature to 375 (depends on oven temperatures), and bake for the same amount of time (45 min to 1 hour). This is a nice casserole dish for a cold winter’s day, when you just want to warm up to something hot and cheesy, enjoy!

 Karen:  This recipe is one that has been in our extended family for many years.  My copy has been lost in those years so I had to write it down from memory.  I think I did ok.  It’s VERY easy to make but quite high in calories and fat.  You use butter, cheese and sour cream!  Need I say more?  They are creamy and yummy and are nice when paired with ham or on just their own with something a bit healthier like a fruit or salad:)  Not sure who had the original recipe but here is ours.  Enjoy!

Cheesy Potatoes

1 kg pkg. of frozen hash brown potatoes

1 onion chopped

1 can of cream of chicken soup

1 C melted butter

2 ½  C (200 g size bar) shredded cheddar cheese

2 C (500 ml) sour cream

Salt and Pepper to taste

Chop the onion, melt the butter and mix everything together in a 9×13”casserole dish.  Bake at 350 degrees for 45 minutes.

Image


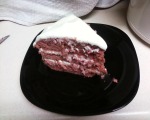
Week 21 – Red Velvet Layer Cake

Chef Jonathan’s Part:

So this week we decided to do a Valentine’s sweet treat (a little late, I know), commonly known as Red Velvet Cake. So, I did the traditional multi-layer cake with Cream Cheese-Buttercream Icing. I found this cake recipe very easy to follow, as long as you have proper knowledge of the creaming method. This recipe also calls for cake and pastry flour, which is usually only used for cakes. If you don’t have this, I recommend buying some, you’ll use it more than you think. The cream cheese icing was also very simple. But next time, I would cream the butter first, then the cream cheese. I found the butter took a long time to cream once I had the cream cheese in the bowl. The hard part comes when you have to fill the cake. Make sure that you’re adding a good amount of icing in between the layers, but ensure you have enough icing for the top and sides as well. The “crumb coating” of icing as they call it, is not worth your time, just frost it all at once. This is a great recipe for a dinner party, and it can also be made into cupcakes, bundt, or loaves. Enjoy!                                                                     


Chef Karen’s Part:  I don’t know where to start with this delicious cake!  I had so many faux pas that I just ended up laughing at myself.  This IS an easy recipe but I decided that I didn’t want to make the whole cake so I planned to make 1/2 of the recipe but turn them into cupcakes, instead..  Ever tried to divide a recipe that calls for 3 eggs?  First issue.  Second issue was that I didn’t check my pantry for red food colouring.  I used green which actually ended up making the cake look like dark guacamole.  Then, I forgot I was making 1/2 the recipe and creamed the full 12 tablespoons of butter.  Oops!  Mistake number 3.  I quickly pulled out 1/2 of it (how can you tell once it’s creamed?) and set it aside for the frosting.  Everything went well until I went to put the batter into the cupcake tins.  I grabbed a measuring cup that I thought was “clean” and started scooping out the batter; this was when I realized i had used that to measure the oil.  At this point I just laughed and hoped that they would turn out just fine…… which they did.

I ended up cutting them in 1/2 and putting frosting in between them.  They now acutally look like tall Whoopie Pies.  The taste is amazing!  I don’t know why I ever buy box cakes when making them from scratch is so much better!  This recipe is moist and crumbly and worth every step I have to take to walk off the calories!  Make them but try to be more professional in your baking, like Chef Jonathan, than I was!

This recipe is from the the Foodnetwork’s website:

http://www.foodnetwork.com/recipes/food-network-kitchens/red-velvet-layer-cake-recipe/index.html


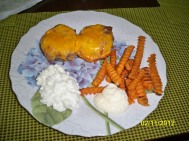
Week 20 – Salsa-Stuffed Muffin Meat Loaves

Chef Jonathan: I like this recipe for “meatloves”, it’s nice for a Sunday Lunch, and they’re small, so you can have more than one! The only thing I left out, was the beans, it sounded strange, and a little too healthy for my taste! I love the salsa on top, and of course I added way too much cheese, which was delicious! I also cooked them 5 minutes longer than recommended, but other than that, no other problems arose. I recommend using your silicone muffin pan, if you have one. It makes things so much easier, and you just pop them out immediately. Enjoy!

Karen:  This isn’t your mother’s old meatloaf recipe!  This is an up-to-date recipe with a twist of cheese that is quite refreshing.  These little guys are so easy and quick to pop in the oven after work. When I made them I omitted the beans because i forgot to buy them and I wasn’t running to the store to pick some up.  I think the recipe with them might be a bit too bulky by using them, anyway, so we didn’t miss them.  That was the only change I made.  I did let them cook a bit longer than requested, too.  I found that cooking them 5 minutes longer satisfied my mind that I wasn’t eating raw meat.  I’ve made them twice: once with ground turkey and once with extra-lean hamburger.  They were more stable with the hamburger but I think that’s because the hamburger has a bit more fat in it than the turkey does.  Either tastes just fine!  Try something new tonight! You’ll be pleasantly surprised!

Image  This recipe is from Canadian Living Magazine.


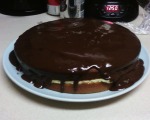
Week 19 – Boston Cream Pie

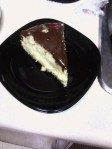
Chef Jonathan: I received March’s issue of FNM in the mail this past week (btw, it’s the Chocolate Issue!), and I just knew we had to make this classic cake. It’s a fairly easy recipe to follow, but I of course made some adjustments. First, the parchment paper “cartouche” is definitely not necessary. This is something they make you do in Culinary School, just to be mean. It’s total overkill, as long as you grease your pan well. My cake actually took longer to bake as well, over the 30 minute mark, but I think increasing the temp. to 375 F, would decrease the time considerably. Also, the Creme Patissiere (custard) was a different recipe than I’ve used in the past, but I used a familiar method and it worked just fine. The only thing I changed was adding a bit of milk to the cornstarch to make a slurry, then adding this to the custard after the eggs and sugar. As always, make sure you temper the eggs first, before returning to the heat, so as not to curdle, and you should be seeing those huge “volcanic” bubbles. As for the ganache, I added a bit more heavy cream to thicken a bit and I loved the ending result, and I’m sure you will too!


Karen: This is the first time I’ve ever made Boston Cream Pie. It’s not a pie but it was founded in Boston. This reminds me of those Boston Cream donuts you get at Tim Horton’s when you need a bit of sugar in the morning 🙂 Quite tasty!

The recipe was easy to make but it did have a lot of steps and it did take some time. I actually ran out of time the one night so I made the cake, let it sit overnight and then made the pudding and the frosting and put it all together the next day. A warning about the decadent chocolate frosting: don’t eat it from the pan BEFORE you put it on the cake. If you do, you’ll have to make more because you will eat it all! I’m going to have to walk another 45 mintues to get off what I ate from the pan AFTER I put it on the cake. At least I got it on the cake, first. My recommendation is to make this for an event so you don’t have it sitting around your house calling your name! You’ll be walking with me to get it off.

  Enjoy!

Here’s the recipe from The Foodnetwork: http://www.foodnetwork.com/recipes/food-network-kitchens/boston-cream-pie-recipe2/index.html